The Perfect Homemade Rice-Dal Dosa Recipe
A healthy and simple home cooked Masala Dosai recipe from a North-Indian's kitchen!
FOOD
Twinkle Suri
4/10/20247 min read
The Perfect Homemade Rice-Dal Dosai Recipe
Coming from a Indian who lives on the other side of the country where both the type of rice and the equipment are not easily available on budget, this recipe is for someone who craves for hot and crispy Dosai like me, but have limited means to make the perfect style South Indian dosai. This is a full proof recipe tried many times. And as far as the cooking and spreading the dosai on the hot plate (tawa) is concerned, there are a few tips as you go along the recipe. The batter is made by the combination of rice and lentils (dal), so all your essential amino acids get into the body. If you don't know, rice is rich in all essential amino acids like methonine and cysteine but lacks in lysine, lentils on the other hand have lysine in them but lack methonine and cysteine. So, a combination of rice and lentils provides one's body with all the essential amino acids and makes up a complete protein rich diet. Further, the process of making the batter involves the process of fermentation, which helps in improving the gut health along with many other benefits.
Above everything else, if you are craving for some delicious and crispy dosai, this recipe is for you! This versatile dish can be enjoyed plain or filled with a scrumptious potato filling. And what's a dosai without a coconut-peanut chutney to accompany it? In this blog post, I will share with you a simple and foolproof recipe to make mouthwatering rice-dal dosai with a delectable potato filling and a flavorful coconut-peanut chutney. Let's get started!
Ingredients (for dosai batter):
1 & 1/2 cup rice
1/2 cup split black gram dal (urad dal)
1/8 cup chickpea lentils (chana dal)
1/8 cup flattened rice (poha)
1/2 teaspoon fenugreek seeds
1 teaspoon salt
Oil or ghee for cooking
Instructions:
1. Soaking the Rice and Dals
Take two separate bowls. In a bowl, add the rice and in another bowl add all the lentils along with the fenugreek seeds. Rinse the rice and the lentils separately in the respective bowls thoroughly with fresh water until the water runs clear. Then, add enough water and cover them. Leave them for soaking for at least 4-6 hours or overnight. Overnight worked best for me.
Tip: In the lentils mixture, some recipes include adding 1/8 cup of pigeon pea legume (arhar dal) as well. I didn't make the recipe using that particular lentil but you can feel free to add it to the lentil mixture during batter formation.
2. Grinding the Batter
Thirty minutes before the grinding of the rice and the lentils, soak the flattened rice (poha) in a separate bowl for 30 minutes only after rinsing it 2-3 times. After the soaking time is complete, drain the water from the rice bowl, the lentils bowl and the flattened rice (poha). Transfer the flattened rice and the lentils in the blender for thorough grinding. Don't use excessive water and add slowly only to aid the grinding process till a fluffy batter is formed. put this grinded mixture in a bowl. Now in a similar way, grind the rice in the same blender with adding little water in between to aid the grinding process. Rice batter will be coarser and depending upon the quality of rice that you used, can remain a little bit gritty even after thorough grinding. I used regular white rice (basmati) used in North India but actually Idli rice or a specific variety 'Sona Masoori' should be used. Rice batter is thin and not as fluffy as the lentils batter. Put this rice batter in the same bowl as the lentils batter and mix them thoroughly using hands.
Tip: The soaking of the rice and lentils is done in separate bowls because lentils usually take less time to soak in comparison to the rice. But, after forming the batters both should be combined and kept in a single bowl for fermentation. Also, i prefer not to add salt during batter formation as it helps me to use the batter for the next 3-4 days easily, since salt decreases the shelf life of the batter after fermentation. Also, traditionally the stone grinder is used for grinding the batter thoroughly but it isn't easily available everywhere (and isn't low on budget) so i used a common blender available at home.
3. Fermenting the Batter
Keep the batter bowl containing the mixed batters covered with a kitchen towel or a plate and keep it in a warm place for fermentation for 8-10 hours or overnight depending upon the temperature and humidity of the place you stay in. Try to not move the batter/ bowl while it is under the process of fermentation. During the fermentation process, the batter will rise and become slightly sour.
Tip: I live in that part of the country where the temperature ranges from 28-35 degree Celsius in the duration of 12 hours. I kept the batter in the closed microwave, without any prior heating of the microwave so that i can keep it in an enclosed space with not much variation in the temperature and there is no movement also.
4. Making the Potato Filling
The morning of making the dosai, i first prepare the delicious potato filling, typical South-Indian style. Firstly, here's what you'll need:
1 large-sized potato(or 2 medium sized), boiled and mashed
1 small onion, finely chopped in juliennes
1 green chili, finely chopped
1-2 cloves of garlic, finely chopped
1 small part of ginger, finely chopped
4-5 cashews, finely chopped (optional)
1/2 teaspoon mustard seeds
1/2 teaspoon split black gram dal (urad dal)
1/2 teaspoon of chickpea lentils (chana dal)
A pinch of asafetida (hing)
A pinch of turmeric powder
A pinch of sugar
A few curry leaves
1 tablespoon oil/ ghee
Salt to taste
To make the potato filling, heat oil in a pan over medium heat. Add the mustard seeds and once it starts spluttering add the asafetida and the curry leaves. Now add the urad dal and the chana dal along with the cashews. Heat them till they turn brown and a roasted smell comes off it. Now add the ginger, garlic and chilies into the pan and cook them for a minute or two. Next, add the julienned onions and sauté them till they turn translucent. Once they are translucent, add a large amount of water (the amount should be enough to dip the whole onions in it). Cook the slurry for a few minutes so that the sweetness of the onions gets inside the water. give it a boil or two and then add the mashed potatoes, turmeric, salt and sugar. Mix everything well and cook for a few minutes till the water cooks off and you are left with a soft vegetable filling with almost like a mashed potato consistency. Your delicious potato filling is ready!
5. Cooking the Dosai
Now comes the fun part – cooking the dosai! I have tried to cook other things like cheela (chickpea batter savory pancakes or moong dal savory pancakes) in the same way a dosai is spread on the skillet (tawa) and cooked to understand and make myself confident in the whole process. Just follow these steps after you have added salt and water to the fermented batter and adjusted its consistency to flowable:
Heat a non-stick or cast-iron skillet over medium heat.
Once the skillet is hot, pour a little bit of water on the skillet and let it cool off a bit. If it is too hot, the batter with immediately stick to the tawa as soon as you'll put it on and you won't be able to spread it at all.
Now, after lowering the heat, put a ladleful of the fermented batter onto the center of the skillet.
Using the back of the ladle, spread the batter in a circular motion to form a thin dosai.
Now increase the flame again to the medium range and let it cook as such for sometime. When it slightly shows signs of being cooked, drizzle a little oil or ghee around the edges and the opening/ holes (formed due to fermentation) in between of the dosai. This can be made without the use of a single drop of oil if you feel like, but the golden color and the crisp taste comes from using the oil/ ghee.
Cook the dosai until the edges turn golden brown and crisp. they will leave the skillet and will be easily removable once cooked.
Flip the dosai if you want and cook for another minute on the other side. If not, then you can put a little bit of ghee/ oil on the upper side and add the podi (a dry mixture of cooked dals, spices and other ingredients) and/or the potato filling.
Remove the dosai from the skillet and repeat the process with the remaining batter, starting off again with lowering the heat, cooling the skillet again and then repeating.
6. Making the Coconut-Peanut Chutney
No dosai is complete without a delicious chutney to accompany it. Here's a quick and easy recipe for coconut-peanut chutney:
1 cup grated coconut
1/4 cup roasted peanuts
1/4 cup roasted Bengal gram
2 green chilies
1-2 cloves of garlic
A small bunch of coriander leaves
1 small piece of tamarind
Salt to taste
1 teaspoon mustard seeds
A pinch of asafetida (hing)
Some curry leaves
1 tbsp or less of oil
To a blender, add all the ingredients except the mustard seeds, asafetida and curry leaves. Blend the whole mixture while adding water to adjust the consistency. Once the chutney is ready, prepare a tempering with the remaining ingredients. To a small pan, add some oil and add the mustard seeds and the asafetida. Once it starts spluttering, immediately take it off the heat and add the curry leaves. Add this tempering to the chutney and mix thoroughly. Your delicious chutney is ready!
Serving:
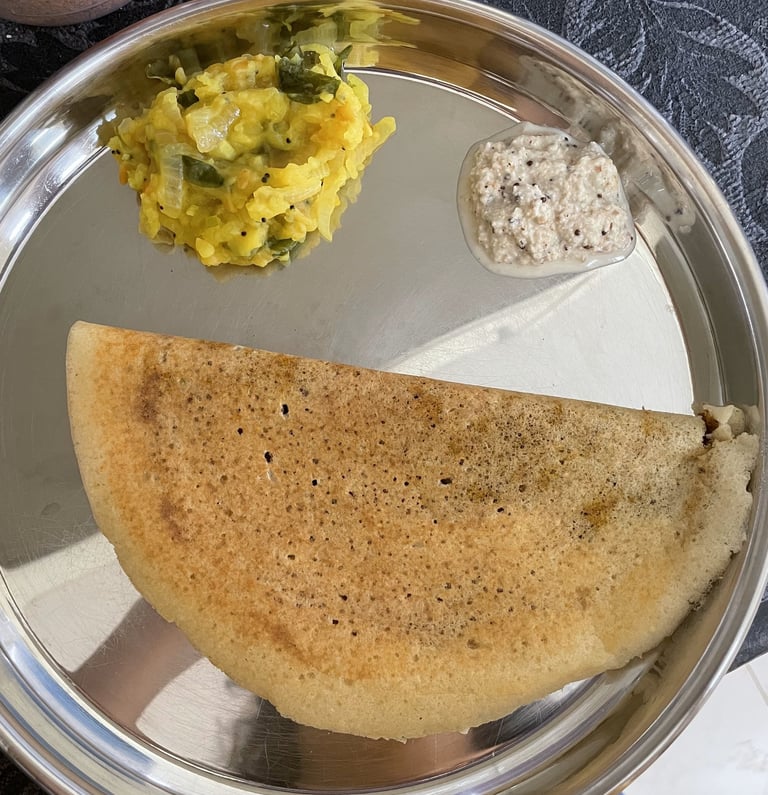
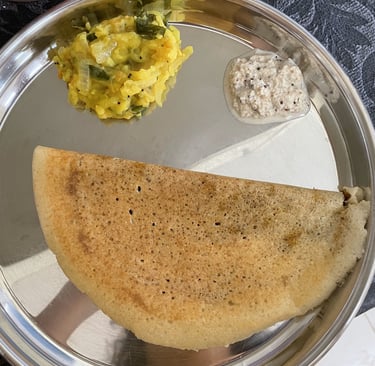
Once your dosai are ready, serve them hot with the delicious potato filling and coconut-peanut chutney on the side. You can also enjoy them with sambar, podi-ghee or any other chutney of your choice. Dosai are best eaten fresh off the skillet, so make sure to enjoy them immediately!
There you have it – a simple and foolproof recipe for homemade rice-dal dosai with a mouthwatering potato filling and a flavorful coconut-peanut chutney. Whether you're a dosai lover or new to this South Indian delicacy, this recipe is sure to impress your taste buds. So, roll up your sleeves, gather the ingredients, and get ready to indulge in a delightful breakfast or brunch treat!